I usually set these up so that they are published on the first day of the even numbered months, but I missed this time because I was so busy doing nothing, that I forgot or as the medical professionals call it, “A senior moment.”
Earn Your Stripes
– Andy Schank
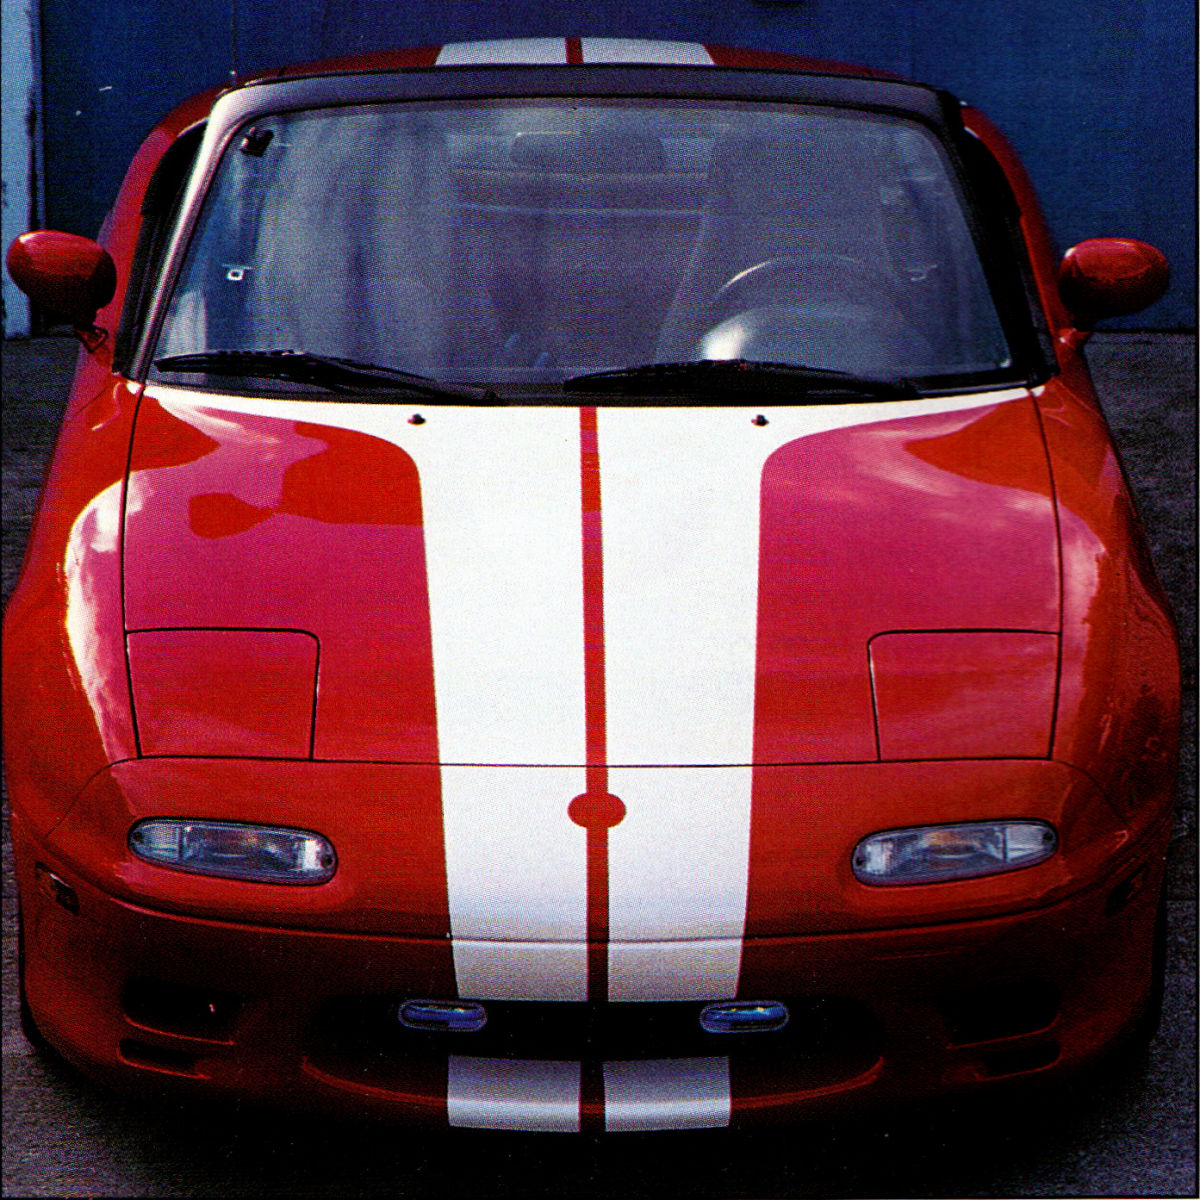 Let’s face it. There are not many cars in production today that can wear big fat racing stripes without looking foolish. The Miata just happens to be one of the exceptions. Intelligently designed stripes make the car look longer, lower, and wider, and accentuate fine details such as the power bulge in the hood and the tapering, sharklike mouth.
Most of the racing stripes I’ve seen on the Miata look pretty good. Still, in my opinion the best design by far is the factory stripe that was available with the R-Model; those flared-out contrasting bands that taper at the ends and flare to embrace the cockpit. No surprise that these stripes came out so well, since they were designed by Irvine’s own Mark Jordan, one of the original Miata stylists and lead designer of the slinky MX6.
Though relatively few dealers know it, the R-Model stripe kit is still available as a factory part. Our local parts guy was so befuddled by the concept, however, that we finally asked Moss Motors to find one for us, which they did. Officially this package is called the “Miata Competition Graphics Kit,” and the cost is about $250. It’s made of the same fairly thick Mylar that you find in race-car graphics, and once it’s installed properly you can pretty much call it permanent. It won’t wash or peel off without a tremendous amount of effort.
The kit comes in two separate tubes, one for the front and one for the rear. Individual pieces aren’t available, however: In other words, don’t screw up the installation. Mazda’s instructions spell out point blank that the kit comes out best when “…installed by a professional experienced with graphics.” Well, I have some experience putting on race decals and plenty with paint and masking tape. How hard could it be?
Live and learn, right?
1) It’s very important that the car and graphics both be between 60 and 80 degrees for the stripes to go on properly. Once you’ve got that set up, the first step is to thoroughly wash and dry the car, then degrease its upper surfaces with rubbing alcohol. Once that’s done, lay the stripes on the body to double-check their fit.
2) Starting at the rear, put a few pieces of one-inch masking tape down as a template for your stripes. You want the outside edge of tape to be almost, but not quite, in the location of the inside edge of the stripes. Keep monkeying with this step until you’ve really got it right; once you’re actually laying down the stripes you won’t be able to get far enough away to check them as you go.
3) Wet down the immediate area to be striped. The factory recommends using soapy water, but I’ve actually had better luck with a slightly diluted solution of a window cleaner such as Windex. The purpose here is to give the glue behind the Mylar a little time to slip and slide around before it locks itself down tight. This helps you get the stripe into position and to work out the inevitable air bubbles and wrinkles that show up under the plastic.
4) Carefully pull back part of the rear cover sheet (which is really stuck on there), lay the stripe into place, and start working it onto the surface with a high-quality squeegee. The easiest way to goof this job up is to have the graphic’s sticky side touch itself, so be careful! If that happens you’re sunk.
When one stripe is correctly in place and no longer mobile, repeat the process with the adjacent stripe. (There are two pieces of stripe per sheet, and small cutouts in the backing paper assist you in placing them correctly. It’s an unusually clever kit in this regard, probably a reflection of its original role as a dealer-installed option.) Now work a squeegee over the stripes from the center to the nearest edge, pulling bubbles out as you go and being careful not to catch any seams or folds. A towel can be used toward the end of the process to wipe away any excess liquid; whatever might still be trapped under the stripes will eventually just evaporate.
5) Now pull off the front cover sheets, which are there to prevent the Mylar from stretching before it’s been put into place. The stripe will probably want to pull up at the edges while you do this, so hold it down carefully with your squeegee; this is not as easy as it looks! Once the upper sheet has been removed, go back in with your squeegee and work out the more egregious remaining bubbles. Small bubbles and imperfections will disappear on their own.
A couple of small corners continue the stripe onto the rear quarters to complete the back half of the package, and these ones are relatively easy. Another set of small pieces is included in case you’re using the OE spoiler.
6) Now for the front monster. Here the kit includes two huge pieces for the hood and two small corners for the lips that reach across the fenders. There are also six other pieces which go around the compound curves of the bumper. Since our project had a recently installed Racing Beat Type 2 bumper, I carefully double-checked the fit of the stripes. They were fine except at the very bottom, where some of the unused rear-spoiler pieces had to be used to fill in the wider lip.
7) Again using masking tape for a guide, follow the same techniques you used in the back. The front cover sheets are particularly hard to remove, and if they get too wet they’ll start to disintegrate and leave little flecks all over the stripes. (You can peel off most of these shreds with tweezers, but it’s a task that’s best avoided.) Lining up the longer front stripes is also harder than the rears, and
working out the bubbles more of a challenge. Not only are they larger, the contours of the hood seem to lead to lots of wrinkles and bubbles. The pieces that fit around the curved bumper are a particular pain, and warming the stripe with a blow-dryer may be necessary to make it all fit. Even so, if you’re patient and placid you’ll wind up with decent results. Rush it or get frustrated and you’ll probably just ruin your $250 stripes.
This installation was no picnic, but the effect of the white stripes on our blood-red project car was absolutely striking. Everyone who saw the car loved it. This kit is not for the person who wants to go unnoticed. The job took me over three hours start to finish, but the resulting fanfare was worth it. Mazda’s pearl-white stripe will look excellent on any red, blue, or black Miata, and maybe even BRG.
One more thing: A few hours after the job, you might see some funky bumps and bubbles growing under the stripes. Don’t freak out: New Mylar stripes often get “poison oak” due to moisture trapped in the glue. After a few days this all evaporates and the stripes will return to normal. (I wish they’d mentioned this in the instructions, incidentally. I only learned the hard way…!)
The other post-install tweak is to go back a full week later with a fine needle and squeegee to pop and smooth any remaining bubbles. (Most of these will disappear on their own, so popping them right away is unwise.) After that, well, enjoy all the stares!